
How to Take Photos on Cloudy Days: A Photographer’s Guide to Gloomy Day Lighting
- Malia Ditto

- Apr 20
- 6 min read
You know by now that photography is all about light. (Go read my photography blog all about finding good light HERE;)
BUT what do you do if it’s cloudy outside?
You wake up and it’s a gloomy, dreary day… now what?!!
Where do you place your subject? Do you cancel the session all together?
Especially if you’re naturally a really warm light/golden tone photographer… How do you navigate this?
No need to fear!!! I grew up in North Idaho (basically the PNW) so I know all about cloudy days;)
Can you take good photos on cloudy days?
Short answer: yes!!

Long answer: They’ll look different, but that’s not a bad thing.
My photography style is naturally very warm, bright, and inviting. Cloudy days can seem cool and distant. The truth is, cloudy days and gray skies really do affect the final outcome of your images. They’re just not as naturally golden and happy.
But that’s not a bad thing!! For example, moody photographers often seek out cloudy days! Clouds can add depth, softness, and emotion. They can create a dramatic storytelling feel!
How I Communicate Cloudy Weather With Clients
First, communication is everything. If you’re a warm and bright photographer, you need to set expectations. I always tell my clients that their photos may not have that same glowy, golden look if it stays cloudy.
From there, I give them the option to reschedule.
Some clients are dead set on the warm, glowy look to their photos, but others could care less… honestly, it’s all about pleasing your client and giving them photos they’ll love, which is why I strive to make them part of the decision process.
Here’s a little example of a conversation I had with one of my clients a couple years ago on a stormy day. The only thing I would’ve done differently is sent examples of photos I’ve taken on cloudy days. This helps them see what to expect instead of trying to imagine it.

Also, just because the day starts out gloomy and cloudy doesn’t mean it won’t clear up! I almost never reschedule in the morning knowing that there’s a chance the clouds will part and the sun will come through. This is honestly my favorite scenario as I love the dramatic sunsets this provides!
As a rule of thumb- I always text my clients the morning of their session. This is when I:
>> Acknowledge the weather
>> Set expectations
>> Let them know if rescheduling is an option
>> Share when I’ll make a final call
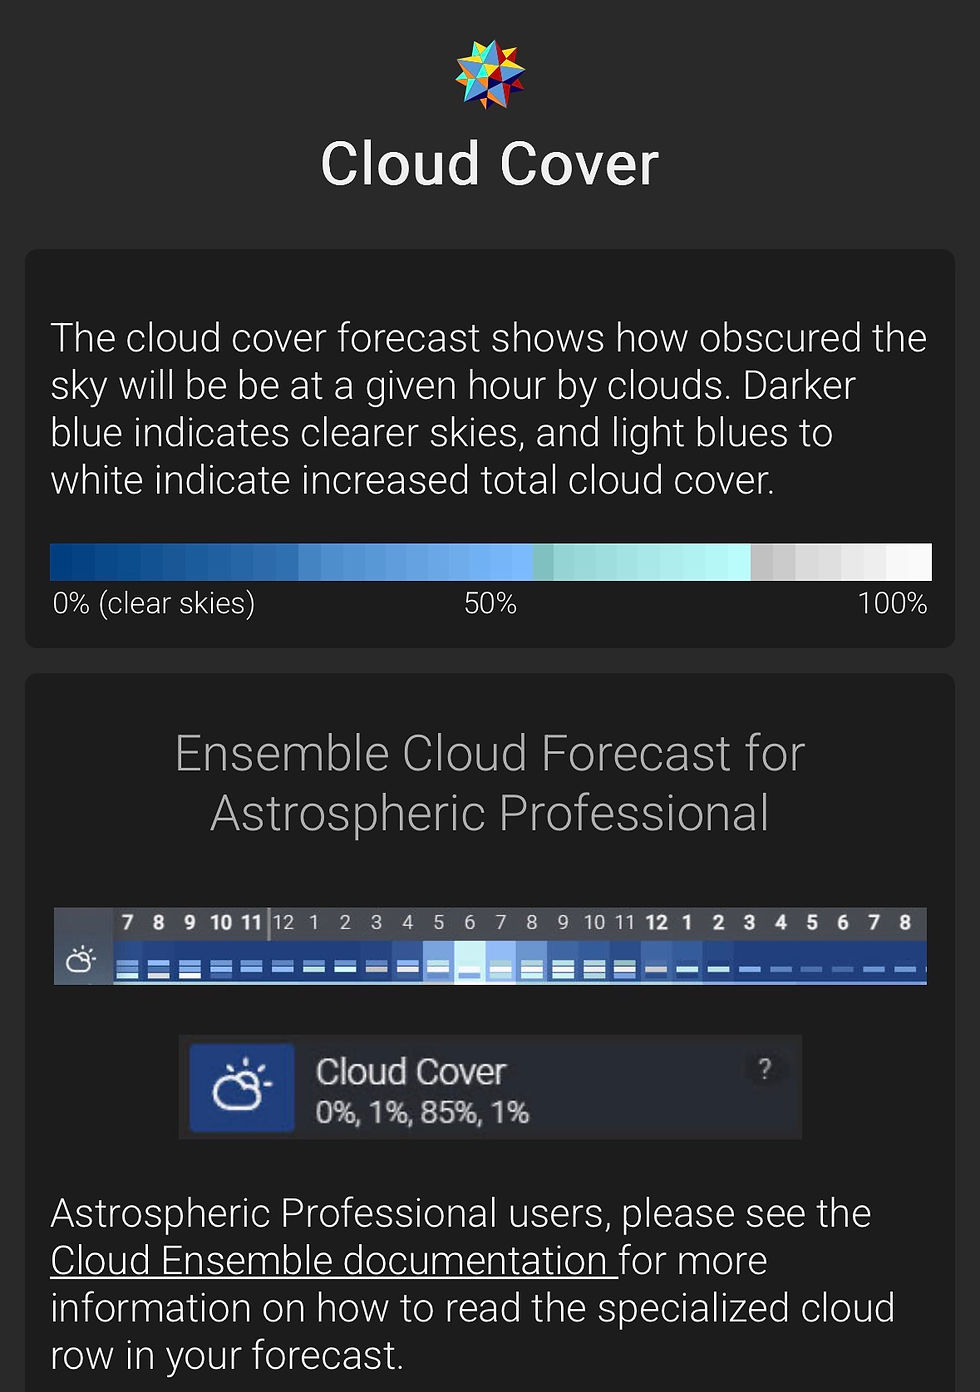
Pro tip: I love using Astrospheric to track cloud coverage hour-by-hour. It shows transparency levels so you can better predict lighting.
Different Types of Cloudy Days (and How They Affect Your Photos)
Not all cloudy days are created equal!!!
It’s helpful to note that there are different levels of cloudy days, too.

Heavy cloud cover (stratus or nimbostratus)- Low thick clouds with no breaks... very common in the PNW!
This is the hardest lighting to work with because the clouds block a lot of sunlight. Everything can feel darker, flatter, and more gray.
What to do:

Shoot earlier in the day
Increase ISO
Open your aperture
Expose properly
Face where the sun would be
Why earlier helps: When the sun is higher, more light can push through the clouds. As the
sun lowers, it has to pass through more atmosphere and those thick clouds, so you lose light quickly.

Partly cloudy (cirrostratus):
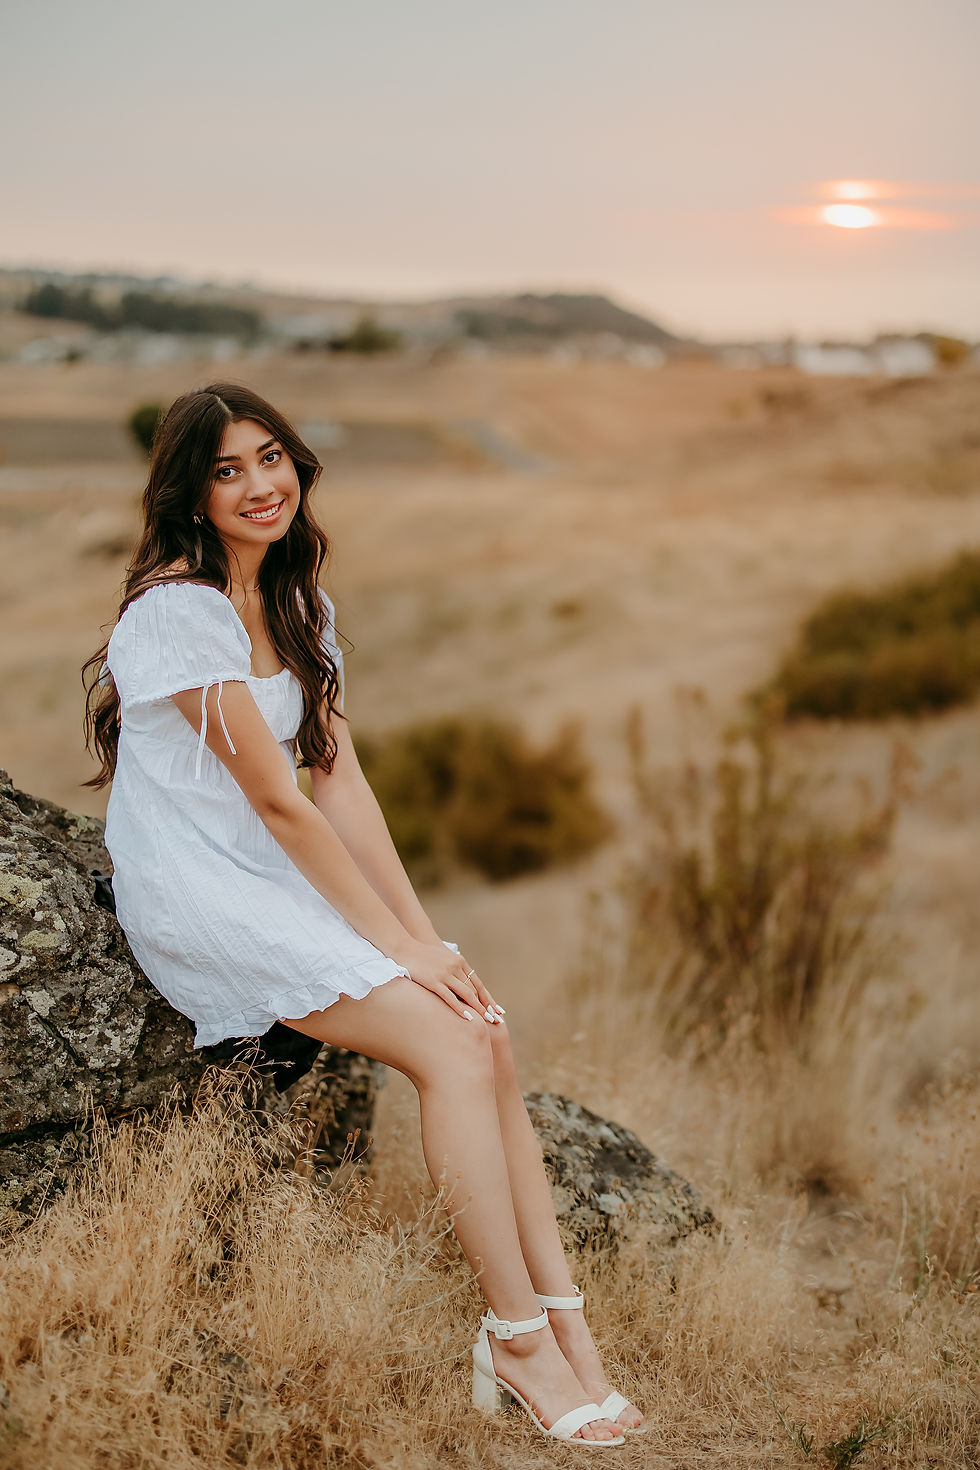
I love me a good partly cloudy sky. Why?? Better sunsets!!
When the sun has clouds to hit and reflect off of as it goes down, it creates way more color, depth, and drama in the sky. Clouds give the sun something to bounce off of, leading to more pinks, oranges, and purples in the sky at sunset!!
What to watch for:
Constant light changes
Exposure shifting quickly
What to do:
Adjust settings as clouds move
Find consistency by waiting for “pockets” of light (all sun or all shade)

Stormy / incoming weather:
I don’t often shoot with stormy skies because of their unpredictability, but the few times I’ve ran into a storm- the light is insane! I know quite a few photographers that search out this kind of light! When a storm is rolling in or just passed, you’ll often get dark, moody clouds with pockets of light breaking through. This can create insanely dramatic lighting! Bright highlights with deep shadows and a lot of contrast.
How to Work With Cloudy Day Lighting
Clouds don’t just change how your photos look… they change how much light you’re working with and how consistent it is. So your job is to adjust based on brightness +
consistency.
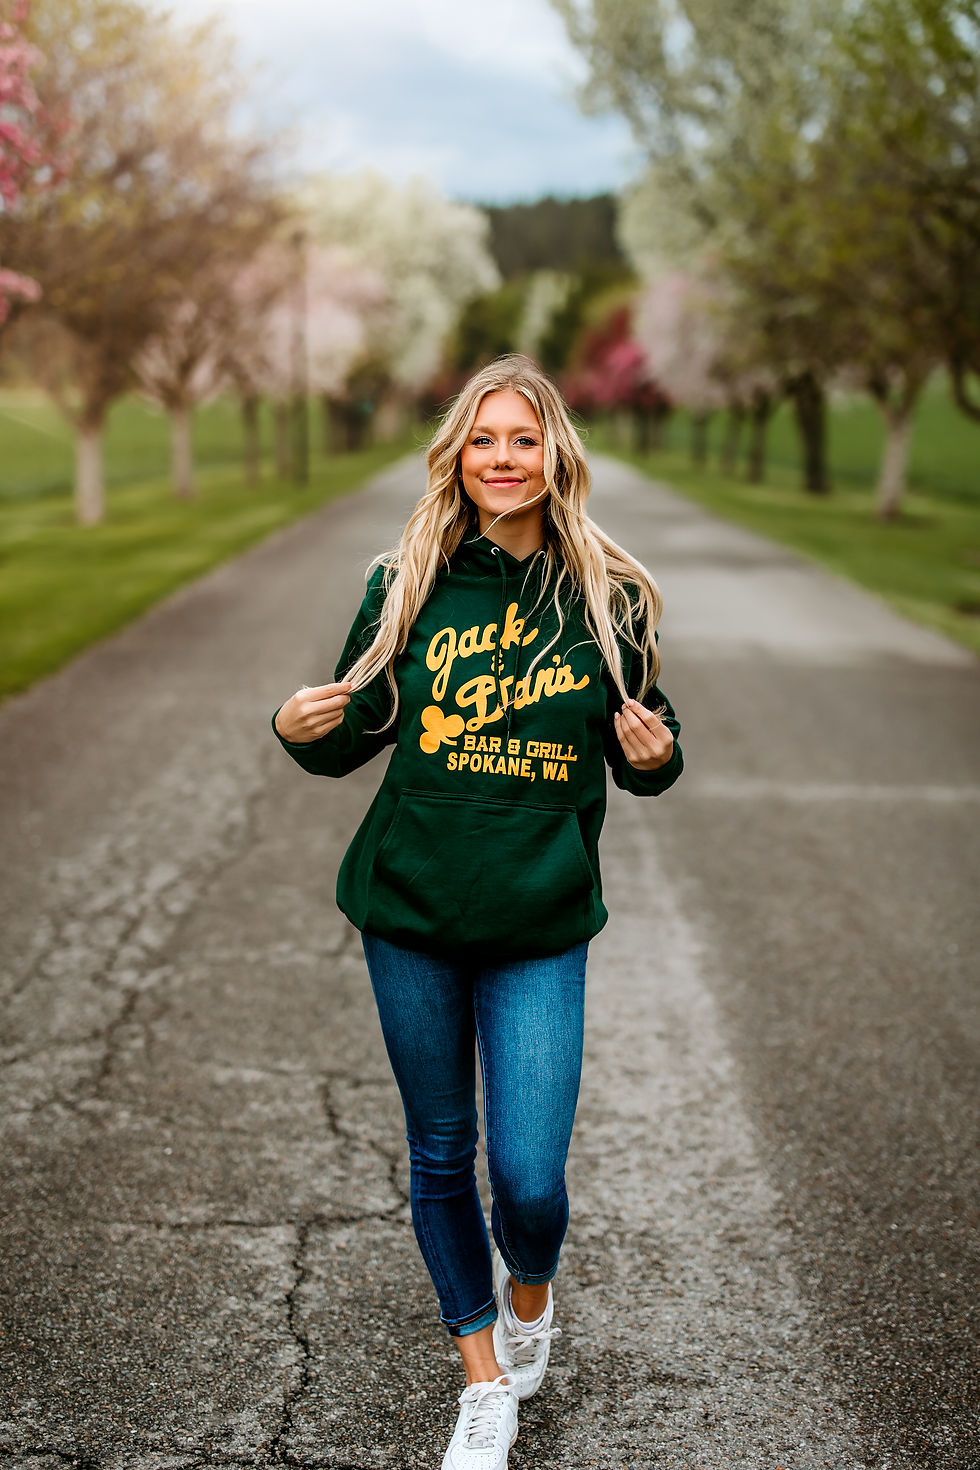
Clouds act as a natural diffuser to the sun, which means the light is a lot softer on your subject- which is actually ideal for softer images. But this also means traditional subject placement rules (filtered light, 45 degree lighting) don’t always apply.
On sunny days, you might turn your subject away from the light to avoid harsh shadows.
On cloudy days you often want the opposite. (but again, no wrong decision here- just different looks!)

If you avoid the light when it’s already diffused, you’ll generally end up with not enough light on the face—which makes editing harder.
Make sure to face your subject towards the brightest part of the sky on heavily clouded days. You want to face the source of the light as much as possible while it’s really soft.
Location Matters More Than You Think
On cloudy days, avoid locations that block even more light (like dense trees or buildings)
Instead, look for:

Open fields
Hilltops
Anywhere with a big, open sky
More open sky means more light is hitting your subject.

I see this way too often- photographers heading to a cute road
lined with trees on a cloudy day and underexposing their photos, then wondering why their images are dark, grainy, and hard to edit! The truth is, there wasn’t enough light in that location in the first place.
As often as you can, have your subjects facing the open sky on a cloudy day. Try not to face them towards a tree line or building.

Timing on Cloudy Days

Golden hour is actually NOT an ideal time to take photos with heavy cloud coverage!!!
With heavy cloud coverage, usable light starts to go away 1-2 hours before sunset.
Why??
Because the light is already being filtered—so when the sun drops lower, there’s barely anything left to work with.
You know how on a cloudy day, everything just seems darker? Well, the light is already so diminished from the clouds, softer light during golden hour, normally perfect on a
cloudless day, turns into almost no light on a cloudy day!
I love to shoot 2-3 hours before golden hour on cloudy days so that the sun is low enough where subjects can tilt their face to the sun source, but it’s not so low that there’s no light.
Midday is actually more usable on cloudy days than you might think, just be aware of how the light is hitting your subject’s face. Be wary of raccoon eyes (shadows under eyes) as a result of the light coming from too high above)
How to Edit Cloudy Photos (and Fix Cool Tones)
Cloudy days naturally create cooler tones.
Here are some tips for warming things back up!

In camera:
Dress your subjects in warm tones! (what your clients wear makes a HUGE difference!)
Reds, oranges, yellows are all warmer colors on the color wheel and will help add some warmth to a generally cooler-toned image.
Look for warm-toned environments (fields, dirt, wheat, neutral textures)
When editing:
Increase white balance (temperature) slightly
Add a touch of magenta tint (warmer) to counter green tones
Use the tone curve to add warmth in highlights
Be careful not to over-desaturate, cloudy days
already mute color!
Add warmth through masking!

Pro tip: Don’t try to force a golden-hour look. Instead, lean into soft, clean, slightly warm tones!! It’ll feel more natural and elevated.
So there ya go! Everything I can think of to share when it comes to working with cloudy days! You can see how the clouds change the vibe of the photos:)
At the end of the day, it's all about communication and being on the same page as your clients so they know what to expect with the final outcome of your photos!
If you want to dive more into lighting and how it affects your images, read this blog post!
If you love the look of my photos and want something similar for your own, check out my presets!
If you're interested in diving deeper into lighting, editing & running a photography business- inquire about a mentorship with me!
Always and forever invested in helping you grow as a photographer! I'm always learning as well- so I'd love to hear some of your cloudy day/lighting tips!
Thank you for your love, support, and care as I work to build an authentic, growth-oriented photography community!
<3 Malia

Comments